Monday, September 15, 2014

New uses for Crescent rolls

I love toaster ovens and when you need to make a quick meal for one or two people it is a useful tool.  Everyone has had the wiener or sausage wrapped in a crescent roll at one time or another but one day I was hungry for something a little different and something sweet so decided to experiment.


I love corned beef and corned beef hash but did not feel like getting out the fry pan and making more dirty dishes. So I took four of the crescents placed two large tablespoons of hash then carefully wrapped it up and sealed the edges. You get something resembling a handheld potpie. The hash heats up nicely and if you sealed it properly nothing comes loose.  Depending on the filling you might wish to cook a little longer.
Here are some other options that I have tried, this is a great way to use leftovers

  • leftover fried chicken that was shredded then spooned a teaspoon of sweet and sour sauce on. That one leaked a little.
  • canned salmon with black pepper and scallions
  • canned chicken with teaspoon of Hoison sauce and dash of Chili sauce
  • boiled egg either whole or chopped with scallions and sweet bell peppers
  • ready made chopped BBQ with an added squirt of honey. This one will really leak so wrap and seal carefully. make sure to spray the bottom of the on this one or the BBQ sauce will stick the whole thing down.
  • another one that works but can leak is the Chunky soups without the liquid of course. Very filling
  • Also of course Sausage. I use the skinless Echrich sausage because I hate taking a bite and the whole thing slides out. Very annoying.
  • and the last one I tried was Bush's Baked Beans drained a little
  • The sky is pretty much the limit just use your imagination and the wetter the ingredient the longer you might want to cook it. Better to be a little crunchy outside then soggy dough on the inside.
So that is four for the main course now is dessert, you can go the simple butter, cinnamon and sugar bit if I wanted cinnamon rolls I would cook that. Instead everybody's favorite Nutella or similar.
Not too thick it will leak out way too much. Just spread evenly.


Then roll normally, I try not to get to close to the edges or the ends.


You can use jam or preserves as well but you have to cook longer to get the inside cooked completely. Do NOT use Jelly it will evaporate and run every where, yes that is the voice of experience. Also be careful especially with small children the jam or preserves will be super heated and can burn badly.


I rarely use a cookie sheet because finding one this small is a pain but heavy duty foil paper folded works wonderfully. A nice light meal or snack for one to two people with little effort. Perfect for the single person who does not want to heat up the oven or the student in a dorm.

Weird rigging of sewing machine

I still have not found my cone thread holder and am too cheap to buy a new one. I posted before about using the straws to hold the cones and they worked for quite a while it was just annoying that they would have to be replaced with a new one when I needed to load a bobbin. Then my brilliant but annoying niece found something for me to use the last time I was sick. I like sodas at room temperature when ill but have nosy cats. She found these at the Dollar General and they were a great solution.


 About the third time I bought them I started thinking because these were heavier, shorter only a little wider then normal straws.


So I tried it and it slipped on beautifully. Just loose enough not to put pressure on the clip that holds the bobbin but not too loose that it will work its way off. Short enough to hold the cone with no problem.


 It worked perfectly and even when I am doing fast sewing and my table wobbles a little (some day new solid sewing table) it never works it's way loose the way straws occasionally did. Also lifts right off for threading bobbins then right back on again no problem.


Paper curtains for teacher

As I have said before my sister is a teacher and when she was setting up her classroom she needed a set of curtains. Easy right, problem was that there were three windows and she already had curtains for  two them.


Very nice, very distinctive and impossible to match as the four panels were identical. While I could have done the same thing it would have looked mismatched so we threw so ideas back and forth and came up with what goes best with pencils "PAPER". So I cut four pieces of material in white and sewed them together leaving about 5 inches open on the top for the rod. I did it this way so that once they are sewn together and turned right-side out there would be a nice finish to the edges.


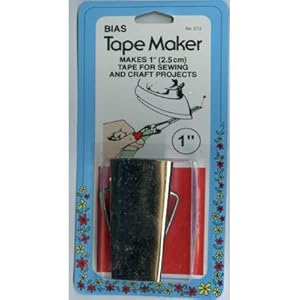
Next of course was the blue lines, here I cheated a little since they were going to be sewn in straight lines with little room for movement I did not bother to cut on the bias. I just cut the strips 1" wide then used my bias tape maker to form the lines I would need. There was some blue shiny cheap sateen left over from some long ago project as well as some red for the line on the side.


I laid out the white background and starting from bottom I used my ruler to mark the edges of each line then pinned them. I used the width of the ruler as the spacing which was approximately 2 1/2". This made it easier to pin. I also checked after every fourth one to make sure I was even in measurement from the bottom because it is easy to start going crooked.


The walking foot made the sewing of the stripes easier. I started to put them in with a wide zigzag but the edges buckled so instead sewed both edges down. I stopped the stripes about 10 inches from the top to make the header. The I measured 4 inches in from the left side to place the red strip. As I got close to the top I had to complete it by hand because of the opening for the curtain rod. I made 3 circles from black material 3 inches wide and spaced them out. I think it came out well. An interesting and fun project.


Sunday, September 14, 2014

Shawl to shrug


I did not realize it had been that long since I posted until I started to download the pictures and realized there were a 150 so I am now going to have several posts over the next couple of days just to catch up.

The first one is my sister got a lovely shawl for her birthday the problem is that she is not really a shawl person because she moves her arms to much when she is teaching. I saw this picture on Pinterest and wanted to try it in a fabric.

Easy Peasy shrug -- I just made this in green.  Love it and learned a new way to start a DC row  - No turn DC, instead of chaining.


I also kept track of the measurements in my notebook so if it worked I could do it again from some interesting material.

First I draped it on her and used safety pins to get the right length and opening for the arms. (I learned the hard way always use safety pins or small binder clips when pinning anything close to the face or sensitive areas. Some people gets so pissy when they get poked.) She wanted the sleeves to be semi close fitted since she does a lot of writing for her class.
I folded the material in half and cut off the fringe. Then marked the angle for the sleeve part.

I used a small zigzag stitch because of the material I did not want there to be a lot of stress on the seam. Then I hemmed in the end. I did not cut the material and serge the edges until I tried it on her for adjustments because it is easier to make something smaller than try to make it larger.
To make sure the top pulled in properly and so it did not fit to tight across the shoulder I added a little elastic to the neck in back.


It does not take a lot but it makes the fit better in the back for someone plus sized.  I wanted drape not snug. You can see from the picture that it is not too obvious but it makes such a difference. I think it came out fairly well and now it is something she can use often.


Tuesday, July 15, 2014

pillow case dress

My niece and her friend were goofing off outside, the hose somehow became involved and you had two soaked people. Normally that would not be a problem but the friend is tiny and anything we had would drown her so I was asked to whip up something fast. Well I thought about the pillow case slips that are easy just a long strip to make the shoulders. Like the one below I found on the internet.


but of course that would be two easy so this is what they brought me.

The t shirt had the sleeves ripped off and the bottom cut for some strange reason and a black pillow case. Okay I could work with this. First I folded the shirt and evened out the edges. I measure around the chest and cut t-shirt to that size it stretches so no need for ease. then measure down for the arm and sewed the sides.


I serged the armhole and left it that remember this was just a temporary top till new clothes were brought. tTen I opened the bottom of the pillow case and attached that to the bottom of the shirt. I had to gather the edges of the case to fit the shirt but it worked.


Toss in a belt and a nice little dress. Took 15 minutes and is a nice disposable dress for summer.

Sunday, July 13, 2014

Extending the life of a hoodie

A friend of the family has a favorite hoodie that as you can see was on a downward slope to the trashcan. At first I figured that I could trim one layer and fold the other layer over to make the cuff but the damage was too much. So I decided to get creative.

First I removed the cuff and did a quick press to smooth the edge. I keep a bag near the sewing table of scraps that could be used, nothing too small because I have a hoarding habit when it comes to fabric and found 1/2 a heavyweight jersey tshirt and cut two rectangles.


I cut the fabric 4 inches wide and 1/2 inch longer then the sleeve. Then I folded each piece in half , sewed it shut with a small zigzag and serged the ends. So I ended up with a neat tube that stretched nicely.


I used a small zigzag stitch to attach it to the sleeve. I was not worried about unraveling I just wanted to be sure it would stretch as needed. Normally I would recommend a dye dip to refresh the color but she like the faded look.

Sometime it is the little things that can give a garment a new life. A 1/2 hour and small piece of fabric later you have a new sleeve. This is also a good idea for the one that fits but the cuff is just too tight or fits funny because it is meant for someone smaller. You will usually find that when you undo the seam the fabric will usually stretch a lot more then you expect so making the cuff bigger will not hurt anything. Measure your wrist for a snug fit and cut the rectangle 1/2 inch longer. Then ease the fabric to the cuff after the first wash it will look natural.

Wednesday, July 9, 2014

Jalepeno bacon cheese bites

My sister found this idea on Pinterest about bacon wrapped jalapenos stuffed with cream cheese. All something I am fond of so she decided that we should try it. They came out pretty good if I say so myself.

I was skeptical especially since they were supposed to be cooked on the BBQ pit. Bacon is a pain to work with under the best of circumstances but what the heck.
First couple of steps are idiot proof, just cut the peppers in half and clean them  letting them air dry completely. Then scoop plain cream cheese try to keep them level it makes it easier to wrap. If you want to spice up the cream cheese you can dice up one pepper (seeds & all) very fine and mix with the cheese or any other spice or flavoring you wish to use. I want to try some with Hoison sauce and diced shrimp mixed in Yummy. Now comes the harder part the bacon.

You need a bacon with a good marbling of fat and not to thick as it will make it harder to wrap. The reason the peppers need to be dry is to keep the cheese from sliding while you wrap.
You will notice that there is a lot of overlap you want this because remember bacon shrinks so use long slice do not cut them.
When you finish it looks like this you can use twine or a toothpick to anchor the bacon while cooking. Or if you did the wrapping right you can just use the weight to hold the bacon in place.
Put them in the fridge to chill the cheese and bacon so it holds together better on the grill.
 Now comes the fun part you can do this in the oven under a broiler just keep a close watch for burning and/or fires. Or you can put some foil down and cook them on the pit. The smoke adds an incredible flavor. Turn once and pull when the bacon looks as done as you like it. Some people like crisper bacon then others.
 Just remember the longer you cook the more chance the cream cheese will run. Other then that enjoy. Just be warned they are addictive as hell and tend to disappear as fast as you get them off the pit.

The other good thing of course is the cost. Doing these as an appetizer for game or movie night is fun. They can be done ahead and frozen or just kept chilled until needed. They are on 1/3 the cost of regular frozen appetizers and twice as good.